

For those of us in the software industry, the task of creating software and making it run reliably while we’re able to move it to any other environment has been a headache since day one. Luckily for us, containers exist. Containers allow us to create runtime environments with all the dependencies required to run any software and isolate them like a "container". This helps us execute containers on our machine or any fellow developer's machine or send them to any development, staging, or production environment while keeping the same consistency. No more "Ops! It worked on my machine."
We have tons of container options on the market, like Containerd or Podman, but in this blog we’re going to talk about Docker. According to Google trends, Docker is the most searched container technology, like... Docker is so widely used in the industry that many people believe it is the only or the first container technology available.
What’s a Docker image?
A Docker image is a file that contains all the commands and instructions to run our containerized apps. Docker images are composed of multiple layers; each layer takes only what it needs from its previous layer, making it efficient on build time and consuming less space on disk.
We can find plenty of official Docker images of software that we normally use, like Nginx, MySQL, or Redis. All those images are stored in a public repository called Docker Hub. We can also create customized Docker images based on other Docker images and store them in the Docker hub. Docker also lets us create our own private self-hosted version of Docker Hub.
There are two methods of running a docker image:
Via CLI: Docker provides us a powerful Cli tool that allows us to manage our docker images. Using the docker cli, we can pull images from the Docker hub and run them on our host machine using custom flags and environment variables. For example, if we want to create a docker container using the official mysql docker image, naming that container "my-sql" and passing a default root password, we can archive that task by simply running this command:
foo@bar:~$ docker run --name my-sql -e MYSQL_ROOT_PASSWORD=my-secret-pw -d mysql:tag
Via Dockerfile: With this method, we need to create a file named "Dockerfile" (this is the official convention).
Important parts of a Dockerfile
In order for us to successfully containerize our app, we need to understand all the important parts of the commands contained in a Dockerfile. Some are optional, but all parts and commands have their purpose. Here we’re gonna explore a few:
- FROM: The from directive basically initializes a new build stage and set a base image. This works as a starting point because with the from command we set a base image. A base image is another image usually stored in the docker hub that contains the minimum requirements for our software to work. For example, the Alphine image is basically a very small Linux that is only 5MB in size.
The from directive can be used multiple times in a single Dockerfile. We can use it to take advantage of the multi-stage build feature that Docker has for us to help us optimize or build.
- RUN: This instruction allows us to run commands inside the building image. Using this instruction will create a new layer.
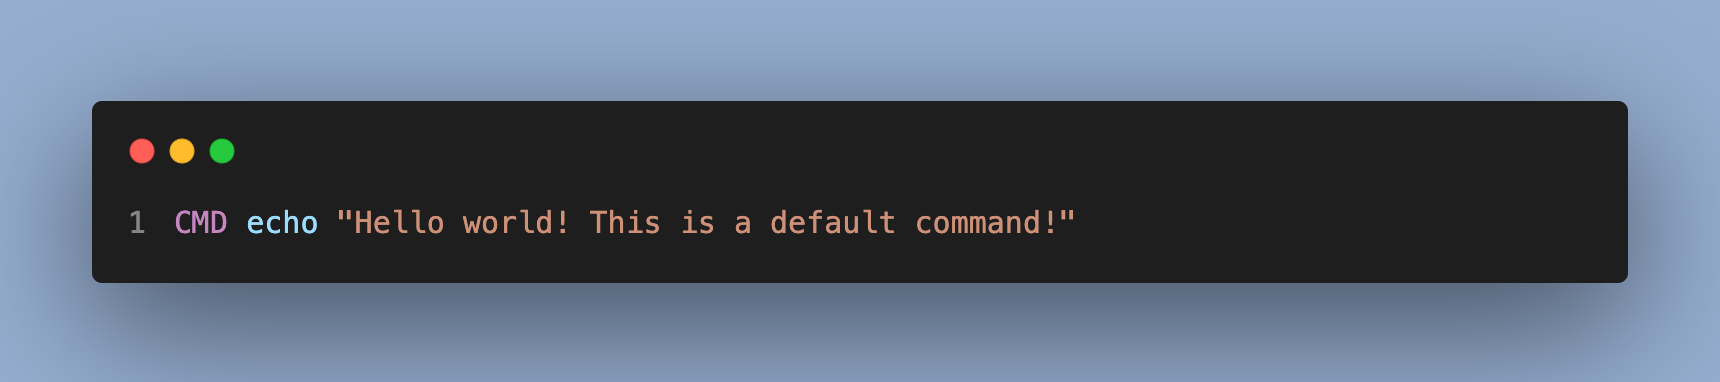
- CMD: The main purpose of this instruction is to set a default command for a new container.
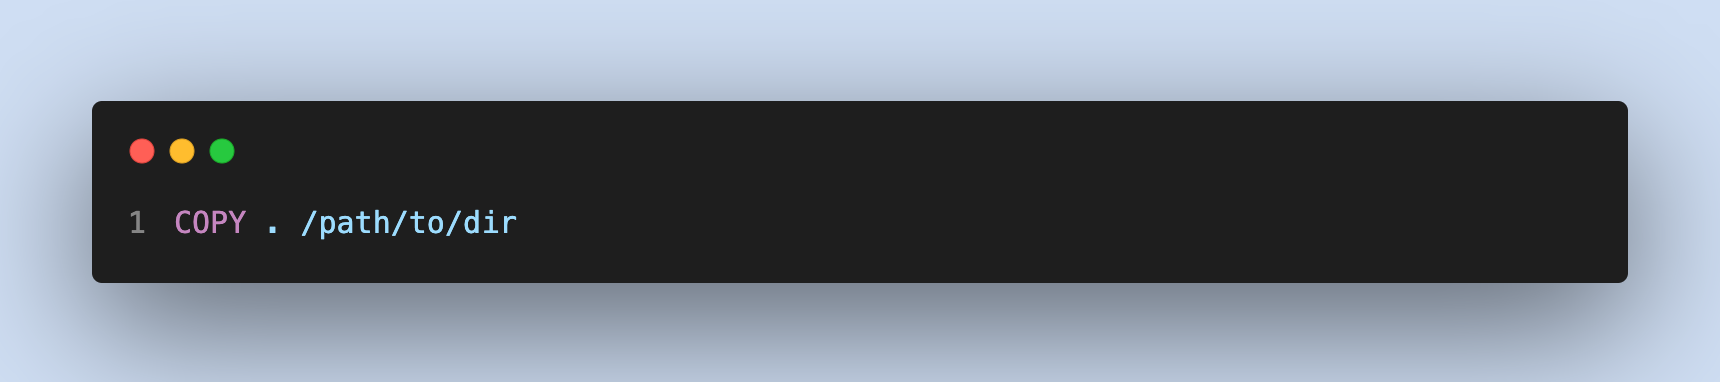
- COPY: During the image build process, you might need to move files from one place to another. For example, if we want to move our application source code into our container, we can do it with this command. Copy takes two arguments: the first one is the source of the things that we want to copy, and the second one is the destination of those files. One thing to take into consideration is that we can copy both files and directories.
- ADD: Add is similar to Copy, but it has a few important differences. For example, with Add, we can copy things from an external URL and also extract files into or image.
- EXPOSE: Expose is important because it helps us document which port our app is going to run on our container. For example, if we’re building a webapp container and it's running on port 8080, we can document it using this command. It’s good to keep in mind that this only documents the port.
- WORKDIR: This instruction sets the working directory for the following commands. We can use it multiple times during the image build process.
There are many others commands we can use in our dockerfile but I won’t cover those in this article for more information you can head to the Docker documentation page, the documentation is really explicit and well written.
Writing our first Docker image.
For our first docker image we’re gonna write something simple but practical since it implements most of the command we reviewed in the past section, it can work as a base to expand it and make more complex stuffs.
This app is going to be a node app with the express framework. This app will respond with a message when we request the root route "/".
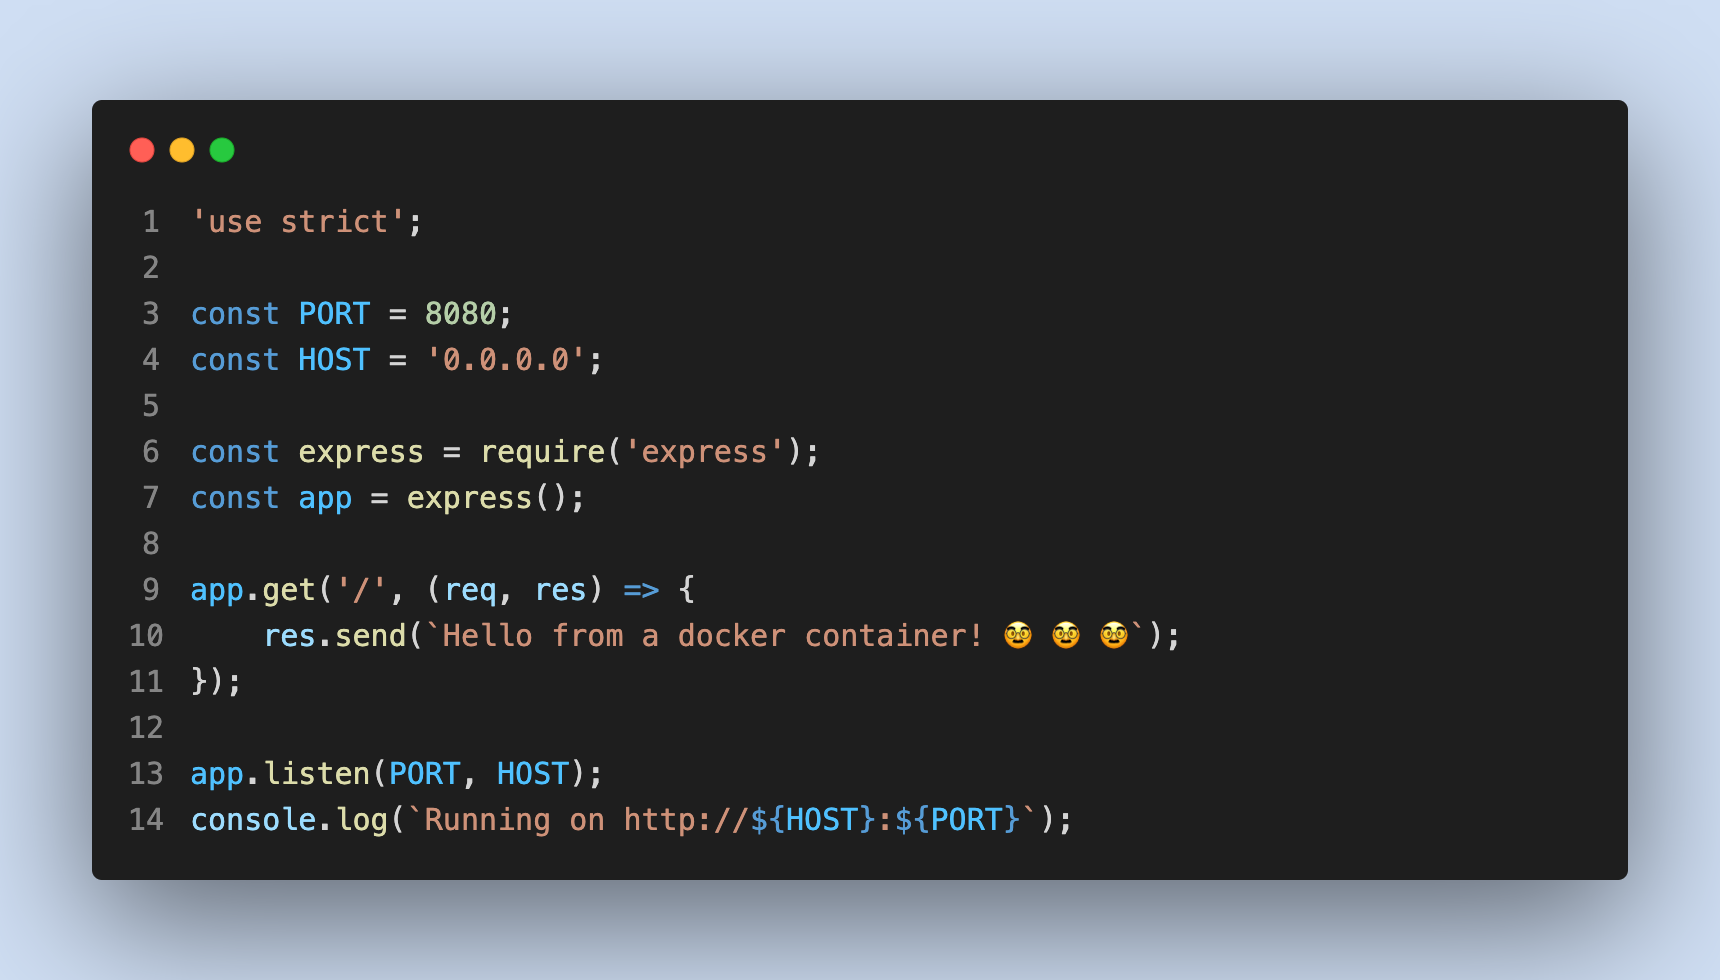
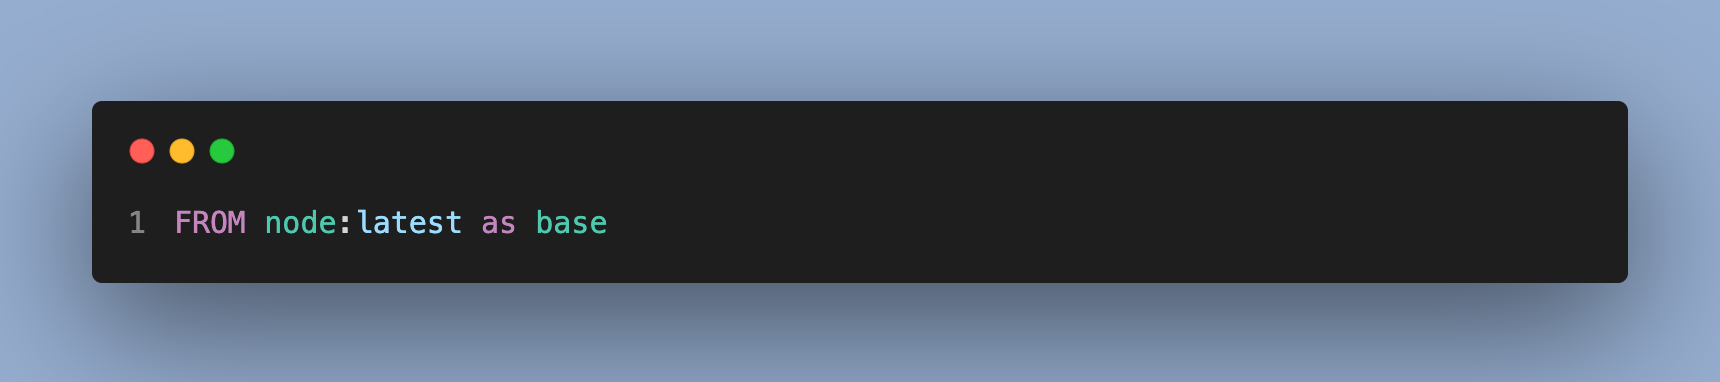
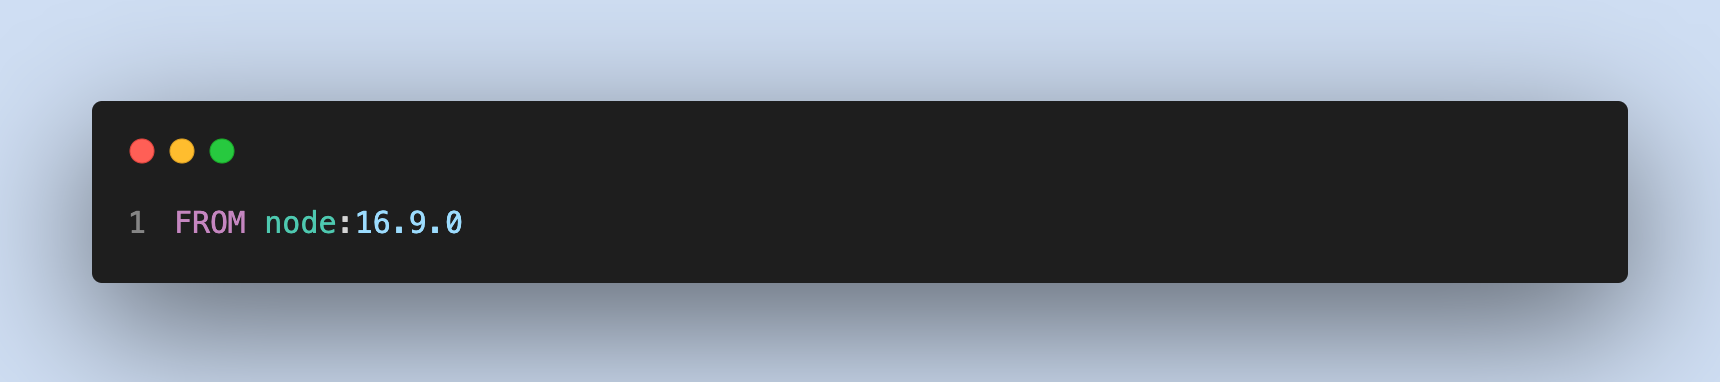
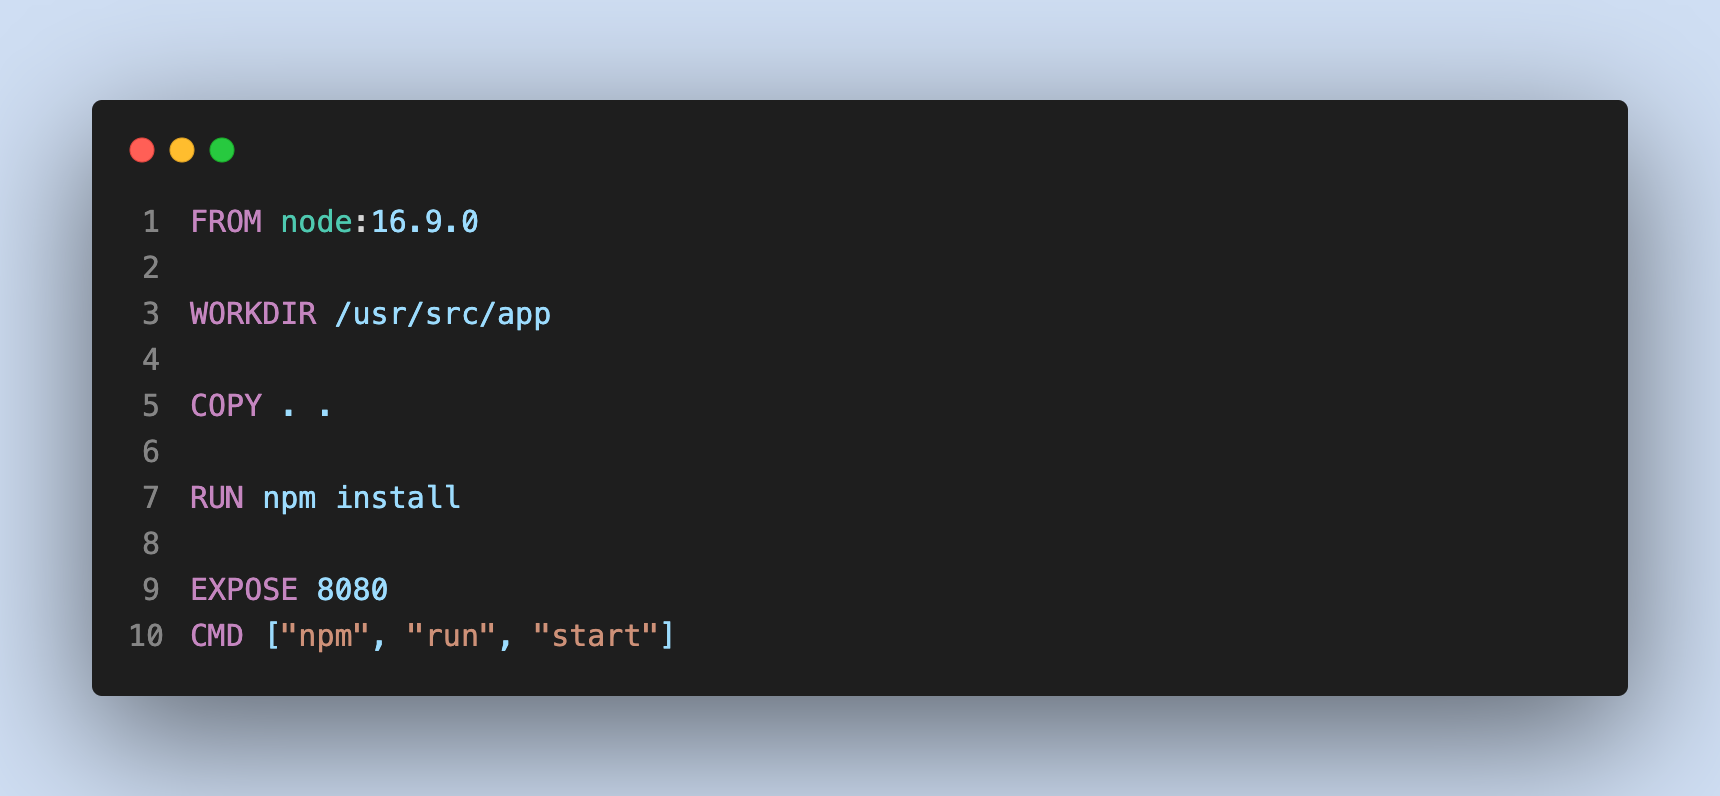
So, now that we have our app ready, we can go and create our Dockerfile step by step. Considering what we have already seen in this article, the first step is setting a base layer for our container. For this, we’re going to use the official node base image. This image has only the things that we need to run our node app.
Now that we have our base image with all we need to run our app, we’re going to set our working directory using the workdir directive.
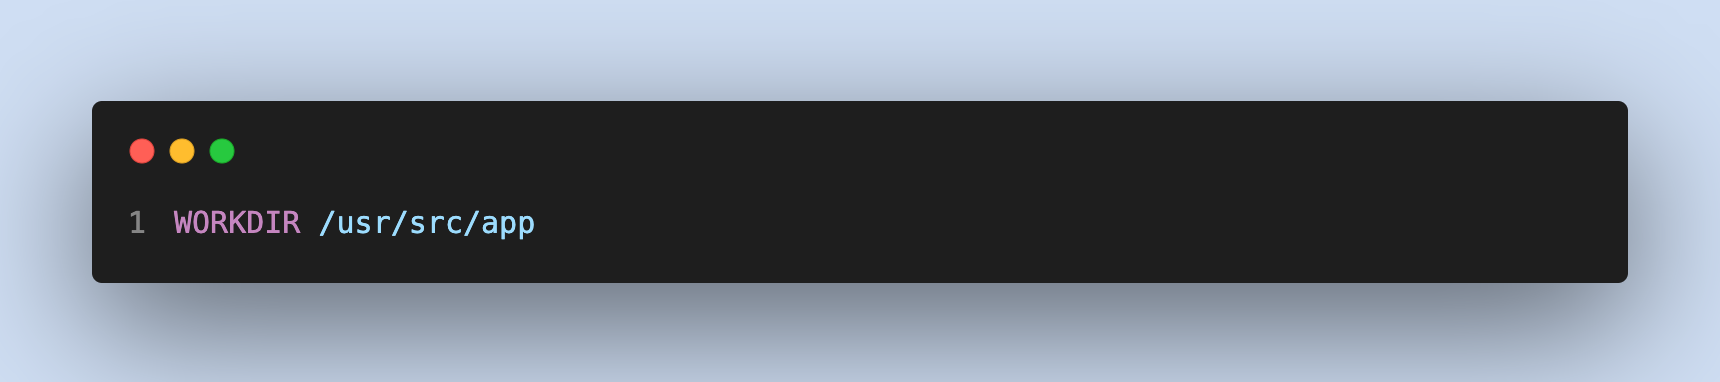
With this command, we can be sure that we are under the directory that we want to work on. Next, we’re going to move our source code to our container using the copy directive.
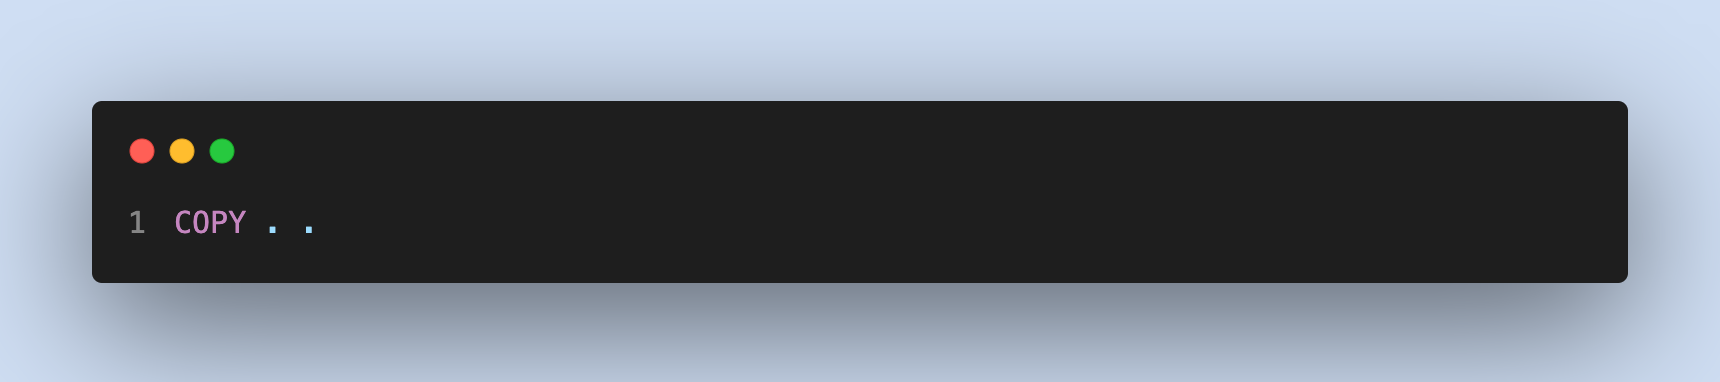
Two things to consider in our last command So, copy takes two parameters: the first one is the source of the files we want to copy. Since our Dockerfile exists in the root of our project, "." will copy everything in that folder. If there’s anything we don’t want to move, for example, our dependency directory (node_modules), we can create a dockerignore file. It works like a regular gitignore file. The second thing to consider is that since we used workdir before copying our files, our current directory is/usr/src/app, so everything will be copied to this directory.
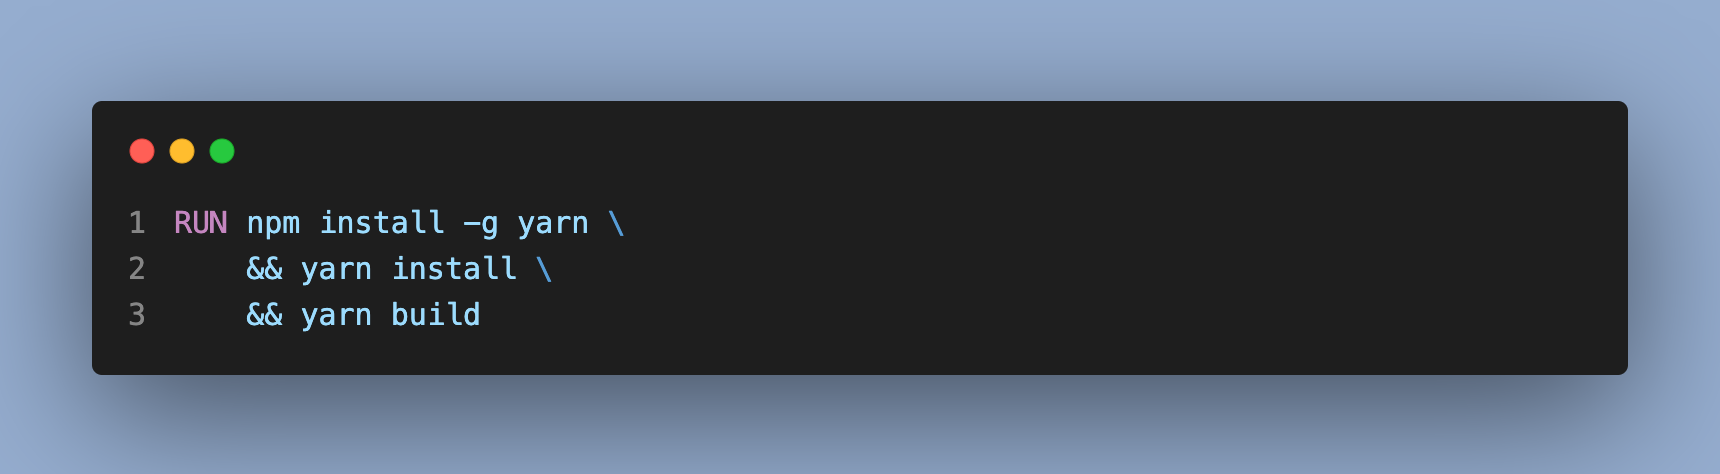
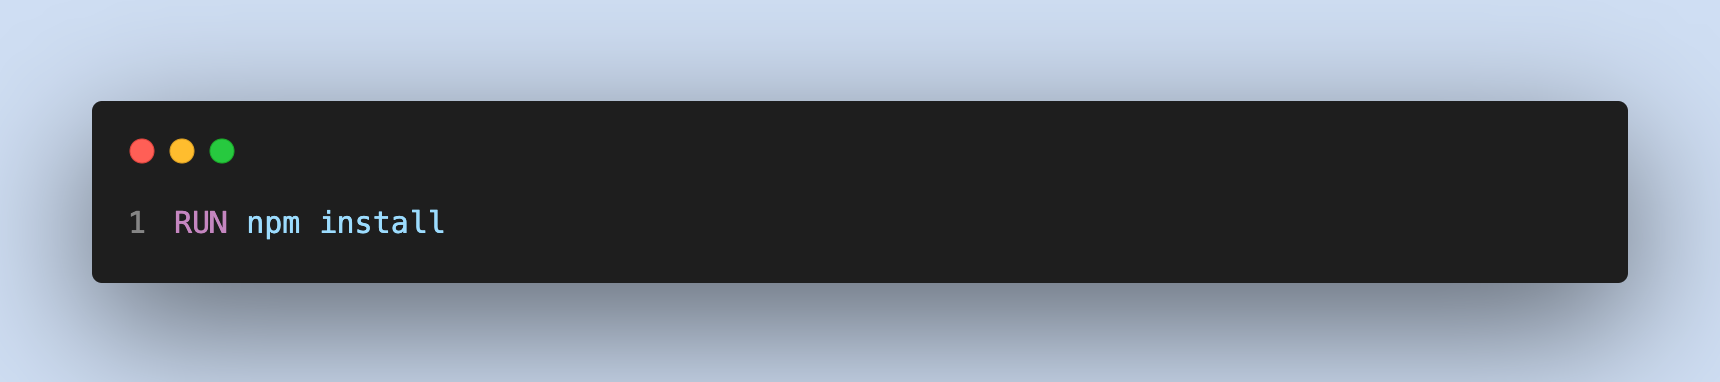
Next, we need to install our node dependencies, so we need to run "npm install". To run commands inside our build, we need to use the RUN directive.
Cool, so we’re almost done. The next two things we’re going to do are document the port that will be used by our app and set the default commands to start our app when we run the container.

Here we document that our port will be 8080 and set the default command to "npm run start".
Our complete Dockerfile should look like this:
Awesome! Now we have our Dockerfile, let’s run it to see if everything is working as it should.
To build our image, we can go to our terminal and run:
docker build -t node/app
This will start the build process. Once it’s done, we can list all our Docker images using docker image ls.

Now that our image is built, the only thing we need to do is run it! For this, we’re going to use the next command:
docker run -d -p 8080:8080 node/app
We’re using two flags with this command, "-d" stands for detached, which will allow us to run our container in the background; and "-p" will help us bind our host port to our container port. We know that our container is internally using port 8080, so we first specify our host port, then the container port our port:container.
And we’re done! Now we can head to our browser and go to localhost:8080 and hopefully see our app running.

In conclusion
This has been a really short but practical way to understand what Docker is and how we can create Docker images, but Docker is a really big technology and we can't see everything in a single blog post. That’s why I’ll try to cover other topics in the next post in this series. I’ll cover things like Docker compose, Docker Swarmp, image optimization, and security. But for now, this is a wrap! I hope you find this article useful for your career, and I hope to see you soon.